07 July 2011

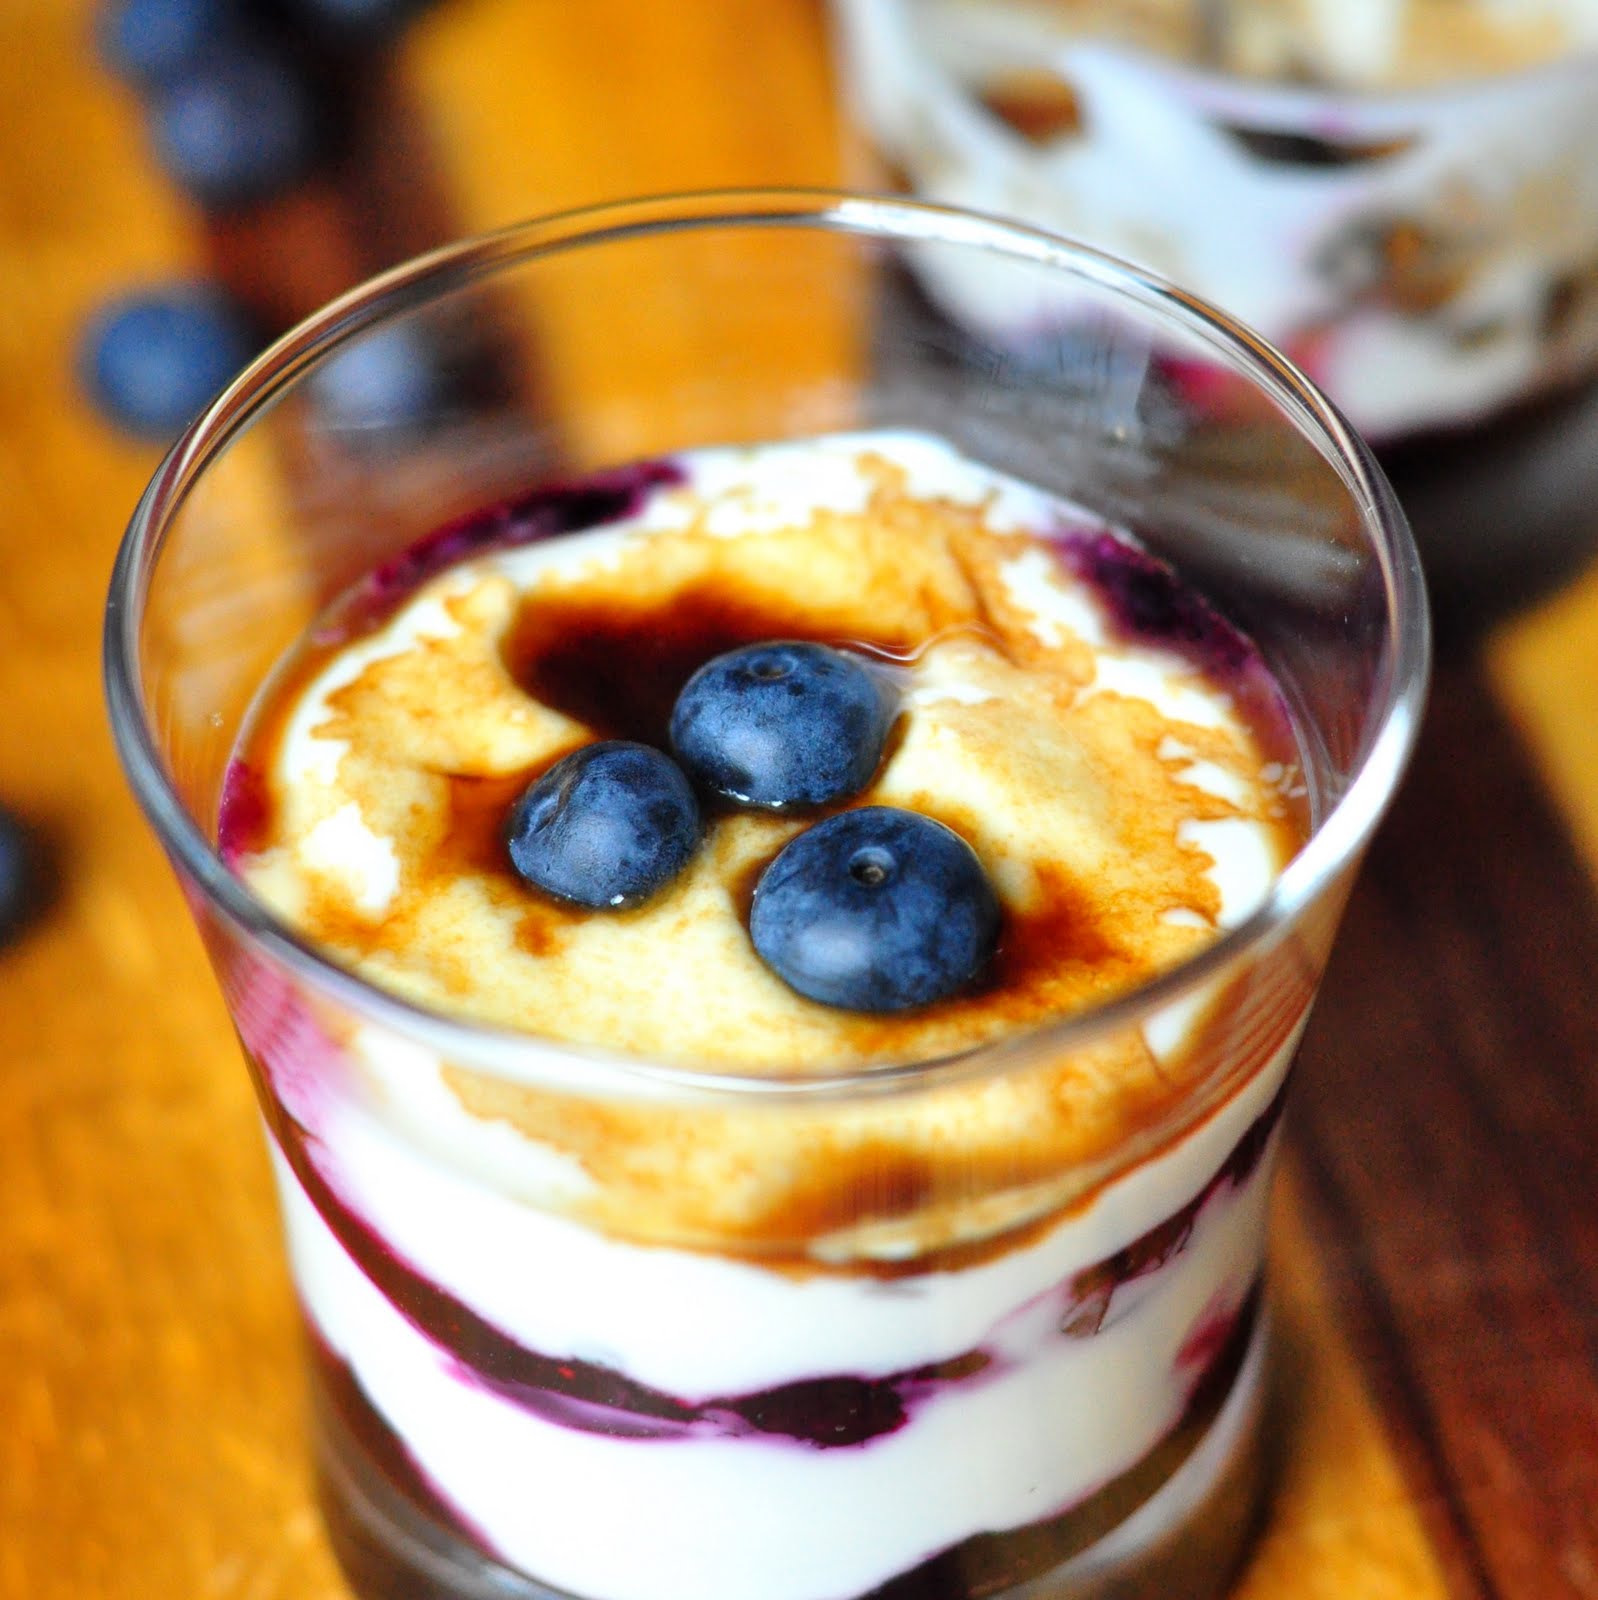
Blueberry Yogurt Brûlée


*****************************************************
Here in our household, we've all been trying to eat more yogurt these days, ever since a recent Harvard study concluded that yogurt was the best food for long-term weight loss. Apparently, the study found that not all calories are created equal. So one could theoretically eat the same number of calories of yogurt as another might eat in, say, french fries, and the former would lose weight while the latter gained weight.

Interesting, you may say. Tragic, if you ask me.

Since the same study also found potatoes to be the worst food for keeping off weight gain.  Hard to swallow as that may be, I can't pretend that the finding was really a surprise. Deep in my gut I always suspected my faulty logic of replacing lunch or dinner with a giant bag of chips wasn't good weight-loss practice (although I frequently pretended it did).  So guilty was I about my unhealthy potato habit (and also for all the times I've used chips to bribe the kids) that I immediately declared our home a potato-free zone for a year. Yes, that means no chips, french fries, mash or hash for 365 days. I think this might be the hardest dietary choice I have ever made in my life. If it makes no difference to our health or weight in a year, you can be assured I will resume my chip habit.

At the same time, I also decided we could all try to consume more yogurt.

I was mulling over a healthy-ish dessert/supper option for tonight (not many, I can assure you) when I chanced upon this Blueberry Yogurt Brûlée in an old copy of Delicious Magazine.  Not only did it look delicious, it was also easy, and more importantly, guiltless. How great is that.   

I LOVE that it uses Greek yogurt, which is richer and creamier and therefore feels absolutely sinful in its luxuriating unctuousness while being absolutely not. A most lovely contradiction. Apparently, Greek yogurt is also healthier than regular yogurt, as it contains more protein and less carbs - all the more reason to make the switch.

The additional step of cooking the blueberries lightly in honey, really helps the flavours to meld together much better than merely folding in fresh berries (which is what I usually do for breakfast). Sprinkled atop the yogurt, the velvety muscovado sugar turns into a beautiful, dark, caramelly syrup, which I slurp up (and pretend is toffee sauce).  Good quality manuka honey, with its unique woody, caramel notes, also makes a real difference to this dessert (so don't use the cheap stuff).
 
Great as a simple dessert, and refreshing for breakfast.  At 112 calories per serving, guiltlessness really doesn't get much better than this.

Recipe for Blueberry Yogurt Brûlée
(by Joy Skipper, Delicious Magazine)

This is a healthier take on crème brûlee which, because of the high cream content, is extremely high in saturated fat. Using yogurt instead of cream makes for a lighter, yet still delicious end to the meal. Serves 4


Ingredients
200g blueberries
2 tsp manuka honey
250g Greek yogurt
4 tsp dark muscovado sugar

Method 

  1. Place the blueberries and manuka honey in a small saucepan and heat gently, until the juices of the blueberries start to run and the fruit softens slightly. Remove from the heat and spoon the fruit and juices into 4 individual serving bowls (about 125ml). Leave to cool.
  2. Spoon the yogurt over the blueberries and sprinkle each bowl with 1 tsp of the muscovado sugar. This will melt and turn syrupy. Place the bowls in the fridge to chill until ready to serve.
Nutritional Information:
Per serving: 112kcals, 3.8g fat (2.6g saturated), 3.6g protein, 9.5g carbs, 14.4g sugar, 0.2g salt

(This dessert was submitted for Sweets for a Saturday Party #25)

06 July 2011

Pandan Chiffon Cake

*********************************************************************
It's amazing what one can accomplish when the baby sleeps. Sugababe 3 took an unprecedented 2 hour nap yesterday and I immediately got to work on this Pandan Chiffon Cake.  It's a recipe from the well-known food blog ieatishootipost that I had been dying to try for some time.  I am pleased to report that the Pandan Chiffon turned out as fluffy, moist, voluminous and delicious as promised, and is easily the best chiffon recipe I have tried so far!

In particular, I really liked that the recipe asked for the additional step of beating the egg yolks until light and lemon-coloured.  Most chiffon recipes only call for the egg whites to be beaten to stiff peaks, and for the egg yolks to be mixed with the other ingredients (i.e. oil, milk, etc).  Beating the egg yolks until they are light does make it easier to fold the egg whites in at the later stage, and also seems to incorporate more air into the batter, which is a good thing. I will definitely be using this technique for all my chiffon cakes from here on.


If like me, you have none-too-fond memories of dry, coarse and scarily mutant-green pandan chiffon cakes sold in local bakeries, you will be won over by this recipe. My Sugababes, who are partial to soft, fluffy cakes, absolutely adored this cake.  And as I always say, anything that my picky eater Sugababe 2 willingly devours, is a must-try!   

Recipe for Pandan Chiffon Cake
(from Leslie Tay of ieatishootipost. Instructions have been summarised and paraphrased in my own words. For more detailed instructions and an excellent step-by-step tutorial, please go to this link)

 Ingredients


A
6 egg yolks
100g caster sugar
115ml corn oil
140ml coconut milk
200g cake flour
2 tsp baking powder
1/4 tsp salt
2 tbsp pandan juice
2 tsp pandan essence
1 tsp vanilla essence
(* You can use 3/4 tsp of pandan paste, in place of pandan juice and pandan essence.  Although convenient, pandan paste definitely tastes more artificial, so stick with fresh pandan and pandan essence, if you can)
** I used Kara brand coconut cream, which is nice and thick)

B
9 egg whites
100g caster sugar
1 tsp cream of tartar

Instructions


Preheat the oven to 170C.

Sift cake flour and baking powder, mix evenly. Set aside. 

Beat egg yolks and sugar until light and lemon-coloured. Add in the oil, coconut cream, pandan juice, pandan essence, vanilla essence and salt. Sift flour and baking powder over the mixture. Mix well until smooth.

Beat egg whites with wire whisk attachment until slightly foamy. Add cream of tartar, and beat until soft peaks. Add in sugar tablespoon by tablespoon and beat until stiff peaks form and mixture does not slide out of mixing bowl when upturned.

Add in 1/3 of the beaten egg whites into the egg yolk mixture and mix gently with whisk, to 'lighten' the mixture. Using a spatula, fold in the rest of the beaten egg whites into egg yolk mixture, gently, to prevent batter from deflating. Do not overfold.

Pour batter into 25cm ungreased tube pan. Run a spatula through the batter to eliminate large bubbles in the batter.

Bake at 170C in preheated oven, for about 55 minutes or until a skewer inserted in the cake comes out clean (or with few dry crumbs adhering)

Remove cake from oven, prop it up on a bottle to cool, upside-down so as to prevent the cake from sinking.

Once cool, remove from tube pan by sliding a knife along the sides, and bottom.

To serve, cut with a serrated knife (so as not to flatten the cake).

(This dessert was submitted for Sweets for a Saturday Party #25

30 June 2011

Let's Do the Hokey Pokey!


Hokey Pokey, Sponge Toffee, Sea Foam, Honeycomb Candy - whatever you may call it, I recently had an inexplicably intense craving to gorge on some - chocolate-covered ones specifically.  This was right on the heels of my cravings for chocolate ice cream, iced chocolate, and chocolate cake, in that order. No, I am no longer pregnant, but cravings while one is breastfeeding can be just as powerful, if not more so.  And in my particular case, it was all the more cruel as having a newborn on my hands meant I had little time to bake up my own treats. Unfortunately, store-bought chocolate treats are largely disappointing.  Blame it on the fact that I've been eating and baking with Valrhona chocolate for almost 3 years now. I never set out to be a chocolate snob, but after you get used to the good stuff, it's hard to enjoy supermarket chocolate.  They taste too waxy and milk-powder-like for me. I bought 3 Nestle Crunchie bars to satisfy my chocolate honeycomb craving. In the end, I barely finished one, and not before scraping off the chocolate to get at the honeycomb insides.  I tried foisting the remaining 2 Crunchie Bars on my kids (how clever of me I thought), but while Sugababe 1 happily polished off hers in a jiffy, Sugababe 2 refused to eat more after a wee bite.  Believe it or not, she's developed a taste for Valrhona chocolate too.  

So if you are asking why bother with scratchmade honeycomb if you can get Crunchie or Violet Crumble, I would say, because you can use better chocolate, that's why. But if you are not partial to that then, by all means, save yourself the trouble.

Having said that, honeycomb really should not be that much trouble. The recipe is simple and straighforward, and if done correctly shouldn't take more than 20 minutes.   I confess however, that having a newborn put me in such a very distracted mummy state that I burnt my caramel no less than THREE times. 

Thankfully, once out of those three times, I ended up with caramel that was not TOO burnt, but salvageable for the purposes of making burnt caramel ice cream.  It was one of those times when my attempts to manage a kitchen disaster brought about a most fortuituous result - an improvised no-churn burnt caramel gelato that didn't take more than 10 minutes to make (minus freezing time).  Yes you heard right -  an Easy No-Churn Salted Burnt Caramel Gelato.  Otherwise known as Obesity 101. I will happily endanger your health by sharing the recipe in a future post. 

In the meantime, back to the honeycomb.  There are many recipes for honeycomb candy, all calling for largely the same ingredients - sugar, corn syrup and the magic-making baking soda.  In the end, I struck honeycomb gold with a recipe that called for the addition of gelatine, which resulted in a better, crispier texture, with fine bubbles throughout.

Making honeycomb is fun and exciting, and always makes me feel rather like a science-experimenting lab genius.  You'd feel the same too when you see how the hot caramel syrup bubbles up into a towering mass of candy foam once the baking soda is added.  If you have older kids (who can handle molten sugar safely under supervision) I can imagine this would make a fun cooking exercise for them.

Look at those little golden nuggets, dipped in luscious milk chocolate. So much better than Crunchies. And super addictive too.  My kids have been asking me for Hokey Pokey all day. These will surely be even more phenomenal with dark chocolate, but unfortunately I'm out. A good excuse, surely, to do the Hokey Pokey again!


***************************************************************************
How to do the Hokey Pokey
(A recipe adapted from Wilde in the Kitchen)

¼ tsp gelatin
1 tsp water
1 ½ cups sugar
½ cup corn syrup
1 tbsp baking soda (sifted)


Melted milk or dark chocolate (tempered)

Butter a 9x9 pan then dust with flour. Tap out excess flour. Alternatively, line pan with greaseproof paper.

In a small bowl, sprinkle gelatin over 1 tsp water and allow to bloom.

In a medium stock pot with high sides, mix sugar and corn syrup together. Heat over medium heat and swirl the pot occasionally to ensure that the sugar dissolves evenly, and the mixture comes to a boil. Do not stir. Clip on candy thermometer and heat to 310° F.

Remove from heat and let sit for a few seconds, the bubbling should subside. Add gelatin and whisk, be careful, the sugar syrup will bubble up. Sprinkle baking soda over syrup and whisk vigorously. Return mixture to the heat and whisk for 30 seconds. The sugar will rise up in the pot, a lot!

Quickly pour into prepared pan, it should come out in a big blob. Do not spread the mixture, just let it settle into the pan. Allow to cool completely (about 2 hours or overnight) before removing from the pan.

Either break into odd pieces or cut into squares (this is a messy process!). To cut into squares - using a serrated knife, score the candy at 1-inch intervals. Snap the candy apart at the score lines. Then score and break into squares.

Dip sponge candies in molten tempered chocolate, tap off excess. Ensure that the honeycomb is completely covered with chocolate, as any exposed parts will absorb moisture from the air and quickly degenerate. Chill in the fridge to set the chocolate shell.

And that's what it's all about!

Notes:
1) The original recipe also called for 1/2 cup of water to be added to the sugar.  This is the 'wet method' of caramelization which takes a longer time. I prefer to use the dry caramelization method and therefore the adapted recipe does not require the addition of water. The caramelization will occur pretty quickly, so one must keep a careful watch on the colour of the sugar syrup. If you are using a digital instant read candy thermometer, great.  If you are eyeballing it, stop once it turns a medium amber shade, otherwise you run the risk of burning it. My preferred method is to drop a few drops of molten syrup into a bowl of water every once in a while.  When it reaches the hard crack stage (which is what we want), the syrup will form hard, brittle threads that break when bent.

If you are not careful and it becomes dark amber, it will be no longer good for honeycomb.  However, if it has only a whiff of burntness but is still fit for cunsumption, quickly pour in 2 cups of milk or cream to stop its temperature from rising (and therefore being TOO burnt) and then make burnt caramel gelato with it.

2) If you cannot be bothered to temper chocolate (like me), simply use tempered chocolate (like Valrhona). When melting, ensure that you do it over low heat (whether in a double-boiler or in microwave) and stir often. Once 2/3 of the chocolate is melted, remove it from heat or microwave, and keep stirring until the remaining chunks of chocolate are melted.

3) Honeycomb degenerates quickly in humid weather. Make sure to store them immediately after making, in an airtight container with food-grade desicants, or they will degrade into a sticky mess within minutes.

27 April 2011

Cranberry New York Cheesecake


***************************************************
New York Cheesecakes are by far my favourite kind of cheesecakes. I like that they are dense and cheesy, and when combined with chocolate,  deliciously fudgey.  A ruby red cranberry topping just takes it over the top.

I adapted a recipe from Smitten Kitchen by (1) adding in whipping cream to lighten up the texture of the cheesecake, (2) incorporating chocolate into the bottom layer of the cheesecake; and (3) giving the cake a cranberry topping. I do love how the bright red topping spills dramatically down the cake when you cut it.
 
Recipe for Cranberry New York Cheesecake
(adapted from Smitten Kitchen)


Crumb crust
8 ounces (227g) finely ground graham crackers or digestives

8 tablespoons (1 stick or 4 ounces or 113 grams) unsalted butter, melted
1/2 cup sugar
1/4 teaspoon salt


Very tall cheesecake filling:
5 (8-ounce) packages cream cheese, softened (or 1134g) (I used Elle Et Vire, great quality and cheaper than Philadelphia. Pick it up from Euraco finefood, next to TOTT Store)
1 3/4 cups sugar
3 tablespoons all-purpose flour
1 teaspoon finely grated lemon zest
1 teaspoon finely grated orange zest
5 large eggs
2 large egg yolks
1/2 teaspoon vanilla
1/4 cup whipping cream
200g dark chocolate


Make crumb crust: Stir together crust ingredients and press onto bottom and up the sides, stopping one inch shy of the top rim**, of a buttered 9 1/2-inch (or 24 cm) springform pan. Pop it into the freezer so it quickly sets while you prepare the filling.

Make very tall cheesecake filling: Preheat oven to 550 degrees***. Beat together cream cheese, sugar, flour and zest with an electric mixer until smooth. Add vanilla, then eggs and yolks, one at a time, beating on low speed until each ingredient is incorporated. Scrape bowl down between additions; I cannot stress this enough as if you do not, you’ll end up with unmixed stripes of cream cheese. I always find at least one, despite my best efforts. Stir in whipping cream and mix until evenly blended.

Melt dark chocolate in a double boiler or microwave, taking care not to burn it.  Divide cheesecake filling in half.  Mix one half with the melted dark chocolate, until even.


Put springform pan with crust in a shallow baking pan (to catch drips). Pour chocolate filling into crust, smoothen the top, then pour the remaining cheesecake mixture in the pan. Bake in baking pan in the middle of the oven for 12 minutes or until puffed. Please watch your cake because some ovens will top-brown very quickly and if yours does too fast, turn the oven down as soon as you catch it. Reduce the temperature to 200 degrees and continue baking until cake is mostly firm (center will still be slightly wobbly when pan is gently shaken), about one hour more.

Run a knife around the top edge of the cake to loosen it and cool the cake completely in springform on a rack, then chill it, loosely covered, at least 6 hours.

Recipe for Cranberry Topping
(adapted from Rose Levy Beranbaum)

1 cup (100g) fresh or frozen cranberries

1/4 cup plus 2 tablespoons (75g) sugar
2.5 teaspoons cornstarch
1/4 cup (59g) water


(Note: If you like more topping, you can use 1.5 recipe like I did) 
In a small saucepan, combine the water, sugar, cornstarch and cranberries and bring to a boil over medium heat, stirring constantly. Stop stirring, reduce the heat, and simmer for 1 minute, swirling the pan occasionally. The mixture will be thick but pourable. Allow it to cool to room temperature.  Spread topping over chilled cheesecake.

17 April 2011

Earl Grey Sticky Date Pudding, with Salted Toffee Sauce

*********************************************************************
I've tried several sticky date pudding recipes in the past, and while none of them were too bad (after all, it is not difficult to like anything served with toffee sauce), they were not particularly memorable either.  Some may consider what I am about to say next rather sacrilegious, but to be very honest, I don't like the 'pudding' texture of sticky date pudding.  What some recipes promise to be "moist" have often turned out for me to be too cloyingly sweet, gummy, sticky and dense.  My memories of most sticky date puddings are that they are sweet in a very one-dimensional, toothache-causing kind of way.

I like this recipe by Rachel Allen very much, because it manages to be very moist without being gummy or overly sticky.  This more open crumb texture means that the cake still has room to soak up the generous lashings of toffee sauce that you will inevitably be pouring over it.  But the best part of this recipe is the addition of black tea, which has a wonderful way of balancing out its sweetness and adding some complexity to its flavour.

I have adapted the recipe very simply by using Earl Grey tea, which complements the naturally-honeyed Medjool dates beautifully with its bergamot notes.  And to bring even more depth of flavour to the sticky date pudding, I salted the toffee sauce, which makes a most amazing difference.  From simple to extraordinary. More toffee sauce, anyone?


Earl Grey Sticky Date Pudding with Toffee Sauce
very slightly adapted from a recipe by Rachel Allen

Ingredients 225g (8oz) Medjool dates (stoned weight), chopped
250ml (9fl oz) earl grey tea (not too strong)
100g (3 ½ oz) unsalted butter, softened
175g (6oz) brown sugar
3 eggs
1 tsp cinnamon powder
1/4 tsp nutmeg powder
1 tsp vanilla extract
225g (8oz) self-raising flour
¾ tsp bicarbonate of soda

Toffee sauce
110g (4oz) butter
250g (9oz) soft light brown sugar (or half brown and half caster sugar)
275g (10oz) golden syrup
225ml (8fl oz) double cream
½ tsp vanilla extract
1/2 tsp fleur de sel/salt
 
Method
  1. Preheat the oven to 180°C (350°F), Gas mark 4. Butter and flour the sides of a 20cm (8in) diameter spring-form/loose-bottomed tin, or a 20 x 20cm (8 x 8in) square cake tin and line the base with greaseproof paper.
  2. Place the chopped dates and tea in a saucepan and bring to the boil. Cook for a few minutes to soften the dates, then remove from the heat and set aside.
  3. Beat the butter in a large bowl or an electric food mixer until soft. Add the sugar and beat until the mixture is pale and fluffy. Beat in the eggs, one at a time, then beat in the spices and vanilla extract. Fold in the date mixture. Sift in the flour and bicarbonate of soda and fold in gently until mixed.
  4. Pour the mixture into the prepared tin and bake for about 45 minutes or until the top is just firm to the touch and a skewer inserted into the middle comes out clean.
  5. Allow to stand in the tin for about 5 minutes before removing and transferring to a serving plate. While the cake is cooking, make the toffee sauce.
  6. To serve, cut into slices (or squares if it is in a square tin) and serve with a scoop of vanilla ice cream or whipped cream and a very generous drizzle of warm toffee sauce over the top!

Toffee sauce

Place all the ingredients in a saucepan set over a high heat and boil for approximately 4–5 minutes, stirring regularly, until it has thickened.

22 March 2011

Easy Quiche Lorraine

*************************************************************************
What makes a good Quiche Lorraine?  Nice, salty bacon, a crisp (as opposed to soggy) crust, and a well-cooked egg custard that is not too dry. The last one is a common problem.

But, anyway, I don't mean to scare you. Because making a quiche is really not that hard.  If a stupid stupid rat creature can do it, well then so can you.

The recipe is an easy one to learn by heart too. Just remember "half fat to flour" for the shortcrust pastry, and 1 egg to 1/2 cup liquid, for the egg custard. The traditional fillings are bacon/ham, and Swiss cheese.  But you can really vary this creatively to include a variety of other ingredients like mushrooms, leeks, broccoli and spinach.

Recipe for Quiche Lorraine

Shortcrust pastry
250 gram flour

125 gram unsalted/salted butter, cut into small cubes, chilled
1/2 teaspoon salt (omit if using salted butter)
1 egg, beaten (optional)
2 - 3 tbsp cold water (may not need all)

Method:
Place flour in a mixing bowl and, using a pastry blender, cut chilled butter into flour until the mixture just resembles coarse breadcrumbs. (Alternatively, you can rub the butter into the flour using your fingertips, but be careful not to handle the mixture for too long as the butter will melt). Add beaten egg, mix well.  If needed, add cold water tablespoonful by tablespoonful until a manageable dough forms. 

Roll out the dough on Silpat or lightly floured surface into a 1/4 inch thick round.  Line a lightly greased tart tin with the dough, taking care to smoothen it out and press out any air bubbles beneath the dough. Ensure that the dough comes up evenly to the top of the tart tin (otherwise the wet custard may leak out).  Trim any excess.

Chill the dough for 30 minutes in the freezer.

Line the top of the shortcrust pastry with parchment paper or foil and weigh it down with baking beans. Ensure that the parchment paper or foil hangs over the sides of the tart tin otherwise the sides will burn before the base is baked.

Bake at 180C for 20 minutes or until the base of the shortcrust is almost dry. Remove baking beans, cut a whole in the parchment/foil such it will only cover the rim of the shortcrust pastry but not the base. Bake for another 10 minutes or until the base of the shortcrust pastry is dry and lightly browned.

Set aside.

Egg custard


250 gram heavy cream
125 gram mix of bacon and ham, sauteed and chopped
2 eggs, beaten
50 grams cheese, shredded (e.g. Swiss, parmesan)
dash of black pepper
pinch of white pepper
pinch of nutmeg
1 tbsp chopped parsley
salt

Mix above ingredients well.  Pour mixture carefully into pre-baked shortcrust tart base.  Bake at 180C for 15 to 20 minutes or until the egg is set.  You can test for doneness by shaking the tart tin a little (the egg should not jiggle!) or poking the egg custard with a skewer.  The skewer should not have traces of uncooked egg. Be sure not to confuse this with the wetness on a skewer that is from the steam in the egg. Do not overcook!

Let cool for 15 minutes before cutting and serving. 

21 March 2011

White and Dark Valrhona Chocolate Mousse Cake

**************************************************************************************
Love is a Many Layered Cake.

That's what I thought when I baked this for my husband's birthday last week. Despite the fact that we already bought an excellent Laurent Bernard chocolate cake for him earlier to celebrate with, I thought I should still bake something special for him.  After all, I always pull out all the stops for the kids birthdays and I thought it was only fair that SugahDaddy got a bit of effort too.  Deciding on the flavour was easy - he likes chocolate and macadamia nuts. It would have to be a boldly flavoured, 'solid' kind of cake and not light, fluffy and sissy (sorry no Chiffons then). And lastly, I love doing layered cakes, because they always manage to look so elegant, special and like something you bought from a chi-chi cake shop (and often for correspondingly less effort than you would think!).

I modified a Bon Appetit recipe on Epicurious, and the result was a 5-layered White and Dark Chocolate Mousse Cake, with alternating layers of white and dark chocolate eggless mousse and Kahlua-soaked chocolate genoise sponge, atop a crunchy macadamia chocolate crust (arguably the best part!).  The contrast between sweet white chocolate and bittersweet dark chocolate was very pleasing, and unlike a pure dark chocolate cake, you can many more slices of this cake as it doesn't feel as heavy.

Decorating the cake was easy - no need to smooth out icing all over the cake. All I did was dust the top all over with cocoa powder.  For this cake, leaving the sides of the cake exposed (instead of covered with icing) actually has a better aesthetic effect. I confess I really like those gold flakes they put on cakes which make them look so luxe. But they cost a bomb, and if like me you'd rather spend money on gold you wear, then well, here's something you might want to try: I sprinkled edible gold dust (from Wilton, cheaper than gold flakes!) in a rough zig-zag pattern over the cake, and also brushed some on the berries on top of the cake. Simple and elegant.

Did SugahDaddy like his cake? You bet. Happy Birthday Luv.

***************************************************************************
Recipe for White and Dark Chocolate Mousse Cake

Cake
1/4 cup (1/2 stick) (57g) unsalted butter
1 teaspoon vanilla extract
1/3 cup (40g) sifted all purpose flour (sifted, then measured)
1/3 cup (40g) sifted unsweetened cocoa powder (preferably Dutch-process; sifted, then measured)
4 large eggs
2/3 cup (150g) sugar

Macadamia crunch base
5 ounces (142g) dark chocolate chopped
1 cup paillette feuillettine 
1/3 cup macadamias toasted, chopped

Dark Chocolate Mousse
5 ounces (142g) white chocolate, chopped 
5 ounces (142g) dark chocolate, chopped
1 1/4 cups chilled heavy whipping cream
pinch of salt

4 tablespoons Kahlua liqueur for brushing on cake layers
Additional unsweetened cocoa powder for dusting on top cake layer
 
For cake:
Position rack in bottom third of oven and preheat to 350°F (176C). Line bottom of 9-inch-diameter cake pan with 2-inch-high sides with parchment paper. Melt butter in saucepan over medium heat. Remove from heat. Spoon off foam from top of butter and discard. Spoon clear yellow butter into small metal bowl, leaving water and milk solids in bottom of pan. Add vanilla to butter in bowl; set clarified butter aside.

Sift flour and cocoa powder together 3 times into medium bowl. Whisk eggs and sugar in large metal bowl to blend. Place bowl with egg mixture in large skillet of barely simmering water; whisk constantly until egg mixture is lukewarm (105°F), about 2 minutes. Remove bowl from water. Place bowl with clarified butter in hot water in same skillet over low heat to keep warm.

Using electric mixer, beat egg mixture until cool and tripled in volume, about 5 minutes. Sift 1/3 of flour-cocoa mixture over egg mixture and gently fold in with rubber spatula. Fold in remaining flour-cocoa mixture in 2 more additions. Fold 1 cup of cake batter into warm clarified butter until incorporated. Using rubber spatula, gently fold butter-cake batter mixture into remaining cake batter.

Transfer batter to prepared pan. Bake until tester inserted into center of cake comes out clean and top springs back slightly when gently pressed, about 30 minutes. Cool completely in pan on rack. (Can be made 1 day ahead. Cover; store at room temperature.)

Run knife between pan sides and cake to loosen. Invert cake onto rack; remove parchment. Using long serrated knife, trim top of cake horizontally, so that cake is level.  Split the cake into 2 layers. Set cake layers aside. 

For macadamia crunch:
Line bottom of 9-inch-diameter springform pan with parchment paper. Melt dark chocolate in a double boiler or in a microwave (being careful not to overheat it).  When chocolate is smooth and completely melted (it should look satiny), stir in pailette feuilettine and nuts. Spread crunch evenly over parchment in pan. Place one genoise cake layer atop crunch layer, pressing to adhere before the chocolate crunch layer cools down and solidifies. Chill until crunch is firm, about 1 hour.
For dark and white chocolate eggless mousse*:
Melt dark chocolate in a double boiler or in a microwave (being careful not to overheat it).  Stir slightly until melted chocolate is smooth. Cool chocolate to lukewarm. Do the same for the wite chocolate.

Using whisk attachment in electric mixer, beat cream and salt in another bowl until very soft peaks form (when bowl is tilted, cream should be fluffy but still pourable and flow to one side). Divide whipped cream into two equal portions. Pour one portion of whipped cream over and fold into dark chocolate just until incorporated. Pour second portion of whipped cream over and fold into white chocolate just until incorporated (mousse will be very soft).

Brush top of chilled cake layer with Kahlua.  Spread dark chocolate mousse over cake in pan. Place 2nd chocolate genoise cake layer over dark chocolate mousse. Brush top of 2nd layer with Kahlua, and spread white chocolate mousse on top. Dust the top with cocoa powder and chill overnight. (Can be prepared 2 days ahead. Keep chilled.)

Run knife between cake and pan sides to loosen. Soak kitchen towel in hot water; wring out water. Wrap hot wet towel around pan sides and hold 30 seconds. Carefully remove pan sides from cake; smooth mousse with knife if necessary. Place cake on pan bottom on rack set over baking sheet. Transfer to platter and serve. 

* You can use crushed vanilla wafers or rice cereal (which was in the original Bon Appetit recipe) as a substitute but the result will not be as good.

**This cake would be great with the usual chocolate mousse made with egg. In fact, the texture of regular mousse is smoother.  I used an eggless mousse (which is really the texture of whipped cream) as I can't consume raw eggs during pregnancy. 

LinkWithin

Related Posts with Thumbnails